Authenticating users
If you don't have a user authenticated you WILL NOT be able to use any of Rook Training SDK features.
In this tutorial you will learn how to:
- Check if a user is authenticated.
- Register a new user.
- Obtain user information.
- Backup user information locally.
Contents
Coding the UI
This section covers 3 activities:
- HomeActivity - The home UI of the app, only accessible when the user is authenticated.
- AuthActivity - A simple login UI.
- LoadingActivity - Will display a logo while checking user authentication status, if success it will redirect to HomeActivity otherwise to AuthActivity. (This activity is for sample purposes, you can also use a Splash Screen)
The file structure should look like below:
your.package.name/
    |-- ui/
        |-- auth/
            |-- AuthActivity
        |-- home/
            |-- HomeActivity
        |-- loading/
            |-- LoadingActivity
Then, go to your AndroidManifest.xml and set LoadingActivity as the launcher activity.
<application>
    <activity
            android:name=".ui.loading.LoadingActivity"
            android:exported="true">
        <intent-filter>
            <action android:name="android.intent.action.MAIN"/>

            <category android:name="android.intent.category.LAUNCHER"/>
        </intent-filter>
    </activity>
    <activity
            android:name=".ui.auth.AuthActivity"
            android:exported="false"/>
    <activity
            android:name=".ui.home.HomeActivity"
            android:exported="false"/>
</application>
- If you still have the MainActivity from previous tutorials you can delete it along with its activity_main.xml
Now, let's create a very simple UI for each activity.
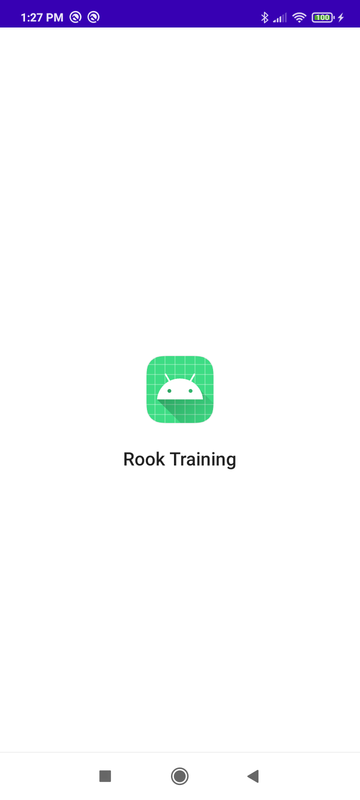
The activity_loading.xml file will show the app's logo and name.
<?xml version="1.0" encoding="utf-8"?>
<RelativeLayout xmlns:android="http://schemas.android.com/apk/res/android"
                xmlns:tools="http://schemas.android.com/tools"
                android:layout_width="match_parent"
                android:layout_height="match_parent"
                tools:context=".ui.loading.LoadingActivity">

    <ImageView
            android:id="@+id/logo"
            android:layout_width="match_parent"
            android:layout_height="wrap_content"
            android:layout_centerInParent="true"
            android:contentDescription="@null"
            android:importantForAccessibility="2"
            android:src="@mipmap/ic_launcher_round"/>

    <TextView
            android:layout_width="wrap_content"
            android:layout_height="wrap_content"
            android:layout_below="@id/logo"
            android:layout_marginTop="20dp"
            android:layout_centerHorizontal="true"
            android:text="@string/app_name"
            android:textAppearance="@style/TextAppearance.MaterialComponents.Headline6"/>
</RelativeLayout>
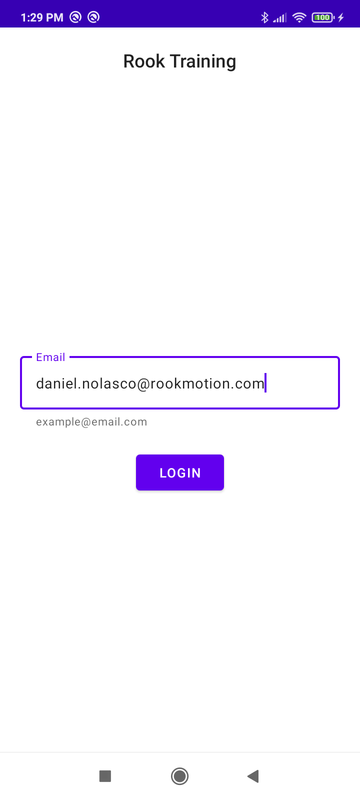
The activity_auth.xml file will show an email text field and a login button.
<?xml version="1.0" encoding="utf-8"?>
<RelativeLayout xmlns:android="http://schemas.android.com/apk/res/android"
                xmlns:app="http://schemas.android.com/apk/res-auto"
                xmlns:tools="http://schemas.android.com/tools"
                android:layout_width="match_parent"
                android:layout_height="match_parent"
                tools:context=".ui.auth.AuthActivity">

    <TextView
            android:id="@+id/title"
            android:layout_width="wrap_content"
            android:layout_height="wrap_content"
            android:layout_alignParentTop="true"
            android:layout_centerHorizontal="true"
            android:layout_marginTop="20dp"
            android:text="@string/app_name"
            android:textAppearance="@style/TextAppearance.MaterialComponents.Headline6"/>

    <com.google.android.material.textfield.TextInputLayout
            android:id="@+id/email_container"
            style="@style/Widget.MaterialComponents.TextInputLayout.OutlinedBox"
            android:layout_width="match_parent"
            android:layout_height="wrap_content"
            android:layout_centerInParent="true"
            android:layout_marginHorizontal="20dp"
            android:hint="@string/email"
            app:helperText="example@email.com"
            app:hintTextAppearance="@style/TextAppearance.MaterialComponents.Caption">

        <com.google.android.material.textfield.TextInputEditText
                android:id="@+id/email"
                android:layout_width="match_parent"
                android:layout_height="wrap_content"
                android:inputType="textEmailAddress"
                android:textAppearance="@style/TextAppearance.MaterialComponents.Body1"/>
    </com.google.android.material.textfield.TextInputLayout>

    <com.google.android.material.button.MaterialButton
            android:id="@+id/login"
            android:layout_width="wrap_content"
            android:layout_height="wrap_content"
            android:layout_below="@id/email_container"
            android:layout_centerHorizontal="true"
            android:layout_marginTop="20dp"
            android:text="@string/login"/>
</RelativeLayout>
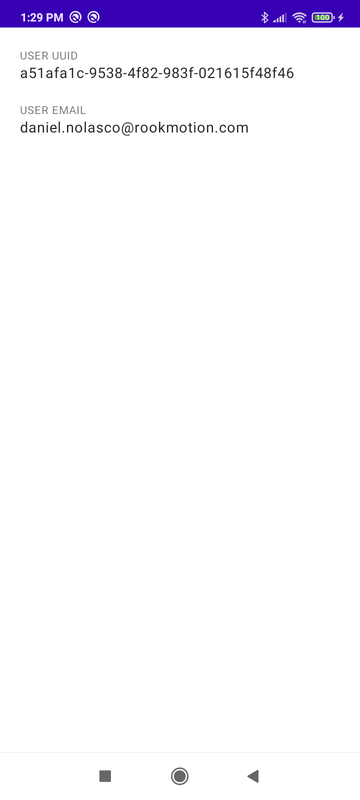
The activity_home.xml file will show the logged user uuid and email.
<?xml version="1.0" encoding="utf-8"?>
<LinearLayout xmlns:android="http://schemas.android.com/apk/res/android"
              xmlns:tools="http://schemas.android.com/tools"
              android:layout_width="match_parent"
              android:layout_height="match_parent"
              android:orientation="vertical"
              android:padding="20dp"
              tools:context=".ui.home.HomeActivity">

    <TextView
            android:layout_width="match_parent"
            android:layout_height="wrap_content"
            android:text="USER UUID"
            android:textAppearance="@style/TextAppearance.MaterialComponents.Caption"/>

    <TextView
            android:id="@+id/user_uuid"
            android:layout_width="match_parent"
            android:layout_height="wrap_content"
            android:layout_marginBottom="20dp"
            android:textAppearance="@style/TextAppearance.MaterialComponents.Body1"/>

    <TextView
            android:layout_width="match_parent"
            android:layout_height="wrap_content"
            android:text="USER EMAIL"
            android:textAppearance="@style/TextAppearance.MaterialComponents.Caption"/>

    <TextView
            android:id="@+id/user_email"
            android:layout_width="match_parent"
            android:layout_height="wrap_content"
            android:textAppearance="@style/TextAppearance.MaterialComponents.Body1"/>
</LinearLayout>
Coding the repositories
The file structure should look like below:
your.package.name/
    |-- data/
        |-- repository/
            |-- AuthRepository
            |-- UserRepository
Create an AuthRepository class with an RM instance as a constructor parameter.
package com.rookmotion.rooktraining.data.repository

import com.rookmotion.app.sdk.RM

class AuthRepository(private val rm: RM) {
}
To check if the user is authenticated call getUserFromDatabase, then check if the response is successful and if the
returned user not null. Also, it's recommended verifying is the user has valid identifiers with the isValid
extension function.
fun isUserAuthenticated(onFinish: (Boolean) -> Unit) {
    rm.getUserFromDatabase { rmResponse, rmUser: RMUser? ->
        if (rmResponse.isSuccess && rmUser != null && rmUser.isValid()) {
            onFinish(true)
        } else {
            onFinish(false)
        }
    }
}
To authenticate and save a user in Database use 3 functions:
registerUserInApiRegisters a user and returns its UUID (if already registered only returns the associated uuid).getUserFromApiUses a user UUID to fetch its profile.saveUserInDatabaseSaves the obtained profile in Database.
fun login(email: String, onSuccess: (RMUser) -> Unit, onError: (String) -> Unit) {
    rm.registerUserInApi(email) { registerResponse, userUUID: String? ->
        if (registerResponse.isSuccess && !userUUID.isNullOrBlank()) {
            getUserProfile(userUUID, onSuccess, onError)
        } else {
            onError(registerResponse.message)
        }
    }
}

private fun getUserProfile(
    userUUID: String,
    onSuccess: (RMUser) -> Unit,
    onError: (String) -> Unit
) {
    rm.getUserFromApi("", userUUID) { getUserResponse, userFromApi: RMUser? ->
        if (getUserResponse.isSuccess && userFromApi != null && userFromApi.isValid()) {
            saveUserProfile(userFromApi, onSuccess, onError)
        } else {
            onError(getUserResponse.message)
        }
    }
}

private fun saveUserProfile(profile: RMUser, onSuccess: (RMUser) -> Unit, onError: (String) -> Unit) {
    rm.saveUserInDatabase(profile) { saveUserResponse ->
        if (saveUserResponse.isSuccess) {
            onSuccess(profile)
        } else {
            onError(saveUserResponse.message)
        }
    }
}
getUserFromApihas 2 parameters the first is a token (which will always be an empty string), and the second is the user UUID.
Finally, the logout functionality which will be needed in future tutorials. Requires 2 functions:
deleteUserFromDBto delete the current user session and cache.doLogoutToDatabaseto delete other remaining info like sensors.
fun logOut(onFinish: (Boolean) -> Unit) {
    rm.deleteUserFromDB(true) { deleteUserResponse -> // Delete user data
        if (deleteUserResponse.isSuccess) {
            rm.doLogoutToDatabase { deleteDataResponse -> // Delete all data
                onFinish(deleteDataResponse.isSuccess)
            }
        } else {
            onFinish(false)
        }
    }
}
When this function's callback returns true take the user back to the AuthActivity, otherwise ask to try again.
That's all for AuthRepository, now for the UserRepository:
Create a UserRepository class with an RM instance as a constructor parameter.
package com.rookmotion.rooktraining.data.repository

import com.rookmotion.app.sdk.RM

class UserRepository(private val rm: RM) {

}
Add a function to get the local user information and another to syncIndexes.
 fun getUserFromDatabase(onSuccess: (RMUser) -> Unit, onError: (String) -> Unit) {
    rm.getUserFromDatabase { rmResponse, rmUser: RMUser? ->
        if (rmResponse.isSuccess && rmUser != null && rmUser.isValid()) {
            onSuccess(rmUser)
        } else {
            onError(rmResponse.message)
        }
    }
}

fun syncIndexes() {
    rm.syncUserIndexes { rmResponse, _ ->
        if (rmResponse.isSuccess) {
            Timber.i("Success syncing indexes")
        } else {
            Timber.e("Default indexes will be used, error: ${rmResponse.message}")
        }
    }
}
Finally, create an instance of the repositories in your.package.name/rm/RMServiceLocator
class RMServiceLocator(context: Context) {

    // Other configuration

    val authRepository by lazy { AuthRepository(rm) }
    val userRepository by lazy { UserRepository(rm) }
}
Coding the ViewModels
This section covers 3 view models:
- AuthViewModel - Used in
LoadingActivityandAuthActivityto handle all authentication states. - UserViewModel - Used in
HomeActivityto retrieve user information and sync indexes.
The file structure should look like below:
your.package.name/
    |-- state/
        |-- AuthViewModel
        |-- UserViewModel
Create an AuthViewModel class extending from ViewModel with an AuthRepository instance as a constructor parameter.
package com.rookmotion.rooktraining.state

import androidx.lifecycle.ViewModel
import com.rookmotion.rooktraining.data.repository.AuthRepository

class AuthViewModel(private val authRepository: AuthRepository) : ViewModel() {

}
Create 3 livedata objects to hold isAuthenticated, login, and logOut states.
private val _isAuthenticated = MutableLiveData<Boolean>()
val isAuthenticated: LiveData<Boolean> get() = _isAuthenticated

private val _loginState = MutableLiveData<LoginState>()
val loginState: LiveData<LoginState> get() = _loginState

private val _logOutState = MutableLiveData<LogOutState>()
val logOutState: LiveData<LogOutState> get() = _logOutState
Then call the repository's functions
fun checkUserAuthentication() {
    authRepository.isUserAuthenticated { _isAuthenticated.value = it }
}

fun login(email: String) {
    _loginState.value = LoginState.Loading

    authRepository.login(
        email = email,
        onSuccess = { _loginState.value = LoginState.Logged(it) },
        onError = { _loginState.value = LoginState.Error(it) },
    )
}

fun logOut() {
    _logOutState.value = LogOutState.LOADING

    authRepository.logOut {
        _logOutState.value = if (it) LogOutState.LOGGED_OUT else LogOutState.ERROR
    }
}
The loginState uses a sealed class and logOutState uses an enum class like the following:
fun resetLoginState() {
    _loginState.value = LoginState.None
}

fun resetLogOutState() {
    _logOutState.value = LogOutState.NONE
}

sealed class LoginState {
    object None : LoginState()
    object Loading : LoginState()
    class Logged(val rmUser: RMUser) : LoginState()
    class Error(val message: String) : LoginState()
}

enum class LogOutState {
    NONE,
    LOADING,
    LOGGED_OUT,
    ERROR,
}
That's all for AuthViewModel, now for the UserViewModel:
Create an UserViewModel class extending from ViewModel with an UserRepository instance as a constructor parameter.
package com.rookmotion.rooktraining.state

import androidx.lifecycle.ViewModel
import com.rookmotion.rooktraining.data.repository.UserRepository

class UserViewModel(private val userRepository: UserRepository) : ViewModel() {

}
Create a livedata object to hold user state.
private val _user = MutableLiveData<RMUser?>()
val user: LiveData<RMUser?> get() = _user
Then call the repository's functions
fun getUser() {
    userRepository.getUserFromDatabase(
        onSuccess = { _user.value = it },
        onError = { _user.value = null }
    )
}

fun syncIndexes() {
    userRepository.syncIndexes()
}
Finally, create an RMViewModelFactory class implementing from ViewModelProvider.Factory with an RMServiceLocator
instance as a constructor parameter.
package com.rookmotion.rooktraining.state

import androidx.lifecycle.ViewModel
import androidx.lifecycle.ViewModelProvider
import com.rookmotion.rooktraining.rm.RMServiceLocator

@Suppress("UNCHECKED_CAST")
class RMViewModelFactory(
    private val rmServiceLocator: RMServiceLocator,
) : ViewModelProvider.Factory {
}
Then override the create function adding a case for each ViewModel.
override fun <T : ViewModel> create(modelClass: Class<T>): T {

    if (modelClass.isAssignableFrom(AuthViewModel::class.java)) {
        return AuthViewModel(rmServiceLocator.authRepository) as T
    }

    if (modelClass.isAssignableFrom(UserViewModel::class.java)) {
        return UserViewModel(rmServiceLocator.userRepository) as T
    }

    throw IllegalArgumentException("Unknown ViewModel class")
}
Helpers
Before integrating ViewModels and Activities let's add some helpers
Go to your build.gradle (app level) and add the following dependency. This will allow us to use the viewModels and activityViewModels delegates.
dependencies {

    // Fragment
    implementation "androidx.fragment:fragment-ktx:1.5.3"
}
- If you already have the Jetpack navigation dependencies you can skip this step.
Next, in the root package create a utils package, then create an RMExtensions kotlin file.
Then add an extension property to obtain the RMServiceLocator instance from Activity and Two functions to print toasts
from Context.
package com.rookmotion.rooktraining.utils

import android.app.Activity
import com.rookmotion.rooktraining.RookTrainingApplication
import com.rookmotion.rooktraining.rm.RMServiceLocator

val Activity.rmLocator: RMServiceLocator get() = (application as RookTrainingApplication).rmServiceLocator

fun Context.toastShort(text: String) {
    Toast.makeText(this, text, Toast.LENGTH_SHORT).show()
}

fun Context.toastLong(text: String) {
    Toast.makeText(this, text, Toast.LENGTH_LONG).show()
}
Integrating ViewModel and UI
LoadingActivity
Create an AuthViewModel instance
class LoadingActivity : AppCompatActivity() {
    private val authViewModel by viewModels<AuthViewModel> { RMViewModelFactory(rmLocator) }
}
Consume the isAuthenticated livedata if it returns true navigate to HomeActivity otherwise to AuthActivity, in
both cases the LoadingActivity will finish.
override fun onCreate(savedInstanceState: Bundle?) {

    authViewModel.isAuthenticated.observe(this) {
        if (it) {
            finish()
            startActivity(Intent(this, HomeActivity::class.java))
        } else {
            finish()
            startActivity(Intent(this, AuthActivity::class.java))
        }
    }
}
Call the checkUserAuthentication function (Added a delay for example purposes).
override fun onCreate(savedInstanceState: Bundle?) {

    // Consume livedata

    lifecycleScope.launchWhenResumed {
        delay(3000)
        authViewModel.checkUserAuthentication()
    }
}
AuthActivity
Create an AuthViewModel instance
class AuthActivity : AppCompatActivity() {
    private val authViewModel by viewModels<AuthViewModel> { RMViewModelFactory(rmLocator) }
}
Consume the loginState livedata and implement all cases:
- Logged - Finish current activity and navigate to
HomeActivity - Error - Show an error message and reset the state.
- Loading - Disable Login button.
- None - Enable login button.
override fun onCreate(savedInstanceState: Bundle?) {

    authViewModel.loginState.observe(this) {
        when (it) {
            is AuthViewModel.LoginState.Logged -> {
                finish()
                startActivity(Intent(this, HomeActivity::class.java))
            }
            is AuthViewModel.LoginState.Error -> {
                toastLong(it.message)
                authViewModel.resetLoginState()
            }
            AuthViewModel.LoginState.Loading -> binding.login.isEnabled = false
            AuthViewModel.LoginState.None -> binding.login.isEnabled = true
        }
    }
}
Call the login function when the user clicks on the login button.
override fun onCreate(savedInstanceState: Bundle?) {

    // Consume livedata

    binding.login.setOnClickListener {
        authViewModel.login(binding.email.text.toString())
    }
}
- This example assumes the input text is always a valid email, in a real app you should validate the inputs.
HomeActivity
Create an UserViewModel instance
class HomeActivity : AppCompatActivity() {
    private val userViewModel by viewModels<UserViewModel> { RMViewModelFactory(rmLocator) }
}
Consume the user livedata and if the user is not null assign the corresponding value to the userUuid and userEmail
text views.
override fun onCreate(savedInstanceState: Bundle?) {

    userViewModel.user.observe(this) {
        if (it != null) {
            binding.userUuid.text = it.userUUID
            binding.userEmail.text = it.email
        } else {
            binding.userUuid.text = "N/A"
            binding.userEmail.text = "N/A"
        }
    }
}
Call the getUser and syncIndexes functions.
override fun onCreate(savedInstanceState: Bundle?) {

    // Consume livedata

    userViewModel.getUser()
    userViewModel.syncIndexes()
}
About UserIndexes
User indexes are crucial in the calories, and effort calculations, they are calculated in our servers based on the user's physiological variables, that's why It's important to sync your user's indexes once every time they open the app.
Running the app
Optional configuration
Before running the app make LoadingActivity and AuthActivity portrait mode only.
<application>
    <activity
            android:name=".ui.loading.LoadingActivity"
            android:exported="true"
            android:screenOrientation="portrait"
            tools:ignore="LockedOrientationActivity">
        <intent-filter>
            <action android:name="android.intent.action.MAIN"/>

            <category android:name="android.intent.category.LAUNCHER"/>
        </intent-filter>
    </activity>
    <activity
            android:name=".ui.auth.AuthActivity"
            android:exported="false"
            android:screenOrientation="portrait"
            tools:ignore="LockedOrientationActivity"/>
</application>
Then go to res > values > themes folder, open both themes.xml and replace the DarkActionBar with NoActionBar.
<resources xmlns:tools="http://schemas.android.com/tools">
    <!-- Base application theme. -->
    <style name="Theme.RookTraining" parent="Theme.MaterialComponents.DayNight.NoActionBar">
        <!-- Theme configurations -->
    </style>
</resources>
Wrapping up
At the end of this tutorial your app should be able to:
Show a loading screen while checking authentication status
Show an auth screen where you can enter an email and start the authentication process.
Show a home screen with your user unique identifier (UUID) and your email.
- If you close the app and open again it should detect you are logged in and take you to the home screen.
Next steps
Congratulations! You successfully authenticated a user,now you can start using all Rook Training SDK features, go to the next tutorial to learn How to retrieve a list of training types.